
INTRODUCTION:
Are you struggling with sleep?
These calming yoga poses could be your solution. Here are seven simple poses to try before bedtime.
Do you often tossing and turning at night, unable to quiet your mind?
You’re not alone. Many people face difficulty falling asleep due to racing thoughts or worries.
While common remedies like reading or sipping herbal tea might help, sometimes you need more.
Light exercise, like yoga, could be the key.
This article is part of Sleep Awareness shedding light on the importance of sleep for overall health and well-being.
Yoga before bed can relax your body and mind, making it easier to drift off into a deep slumber.
For additional tips on improving sleep naturally, consider exploring other sleep aids for insomnia or our comprehensive sleep tips.
How Yoga Can Improve Your Sleep
Yoga is more than just physical exercise; it’s a powerful tool for reducing stress and promoting relaxation.
Research conducted in the year 2019 suggests that practicing yoga may lower cortisol levels, the hormone linked to stress.
While the degree of cortisol reduction varies based on factors like frequency and intensity of practice, studies also show promising effects on symptoms of depression.
Integrating yoga into your routine can complement traditional treatments and contribute to overall well-being.
How does Yoga relate to sleep?
Cortisol levels play a significant role in sleep patterns, with elevated levels often leading to difficulty falling and staying asleep.
Studies from 2019 indicate that incorporating yoga into your daily routine can positively impact insomnia symptoms, suggesting potential benefits for sleep quality and overall sleep health.
Yoga Poses for Better Sleep
The National Survey reports that Yoga presents a tranquil and rejuvenating approach to unwind at the end of your day., more than 55% of people who practised yoga reported improved sleep, while over 85% found it effective in reducing stress.
By incorporating supportive props like bolsters, blankets, and blocks, you can enhance the comfort of each pose, allowing you to stay in them longer and focus on your breath.
Your breath plays a crucial role in relaxing in these poses.
In yoga, breath is just as important—if not more important—than the physical pose itself.
One gentle and calming breath technique commonly used is Ujjayi Breath, also known as Ocean Breath or Victorious Breath.
To practice, inhale deeply through your nose, then exhale through your nose while constricting the back of your throat, creating a sound similar to ocean waves or Darth Vader from Star Wars.
Use this slow and steady breath to soothe yourself in each pose.
These poses cater to all experience levels, making them suitable for beginners.
As you transition between poses, focus on your breath and areas of tension in your body.
If you feel discomfort, remember to breathe and relax. Aim to spend 20 to 30 minutes moving through these poses before bedtime.
Practice these yoga poses right before bedtime, spending about 3 to 5 minutes in each pose. Remember to utilize your Ocean Breath in each pose, except for Corpse Pose, where you can allow your breath to return to normal.
1. Wide-Knee Child’s Pose (Balasana):

Balasana, commonly known as the Child’s Pose in Yoga, embodies a restorative and grounding practice renowned for its calming and soothing effects.
This gentle asana quiets the mind, alleviates stress, and softly stretches the hips, lower back, and thighs, offering relief from back pain through gentle spinal elongation.
Also recognized as Shashankasana or Garbhasana, Balasana acts as a recuperative posture post vigorous activities, aiding in the gradual normalization of breath.
It serves as an excellent interlude between more dynamic poses, promoting improved posture, diminished discomfort, and enhanced overall well-being.
How to Practice Balasana:
Begin on all fours, positioning knees apart while maintaining contact between the tops of feet and the floor.
Slowly lower your torso to rest between your thighs, gently lowering your forehead to the ground.
Extend your arms forward or backwards, palms resting on the floor or facing upward.
Focus on steady breathing, deepening relaxation with each exhale.
Maintain the pose for several minutes before returning to a seated position, gradually opening your eyes.
Conclude by rubbing your hands together and placing them gently over your eyes and face, absorbing their warmth.
2. Standing Forward Bend (Uttanasana)
3. Standing Half Forward Bend (Ardha Uttanasana) at the Wall:
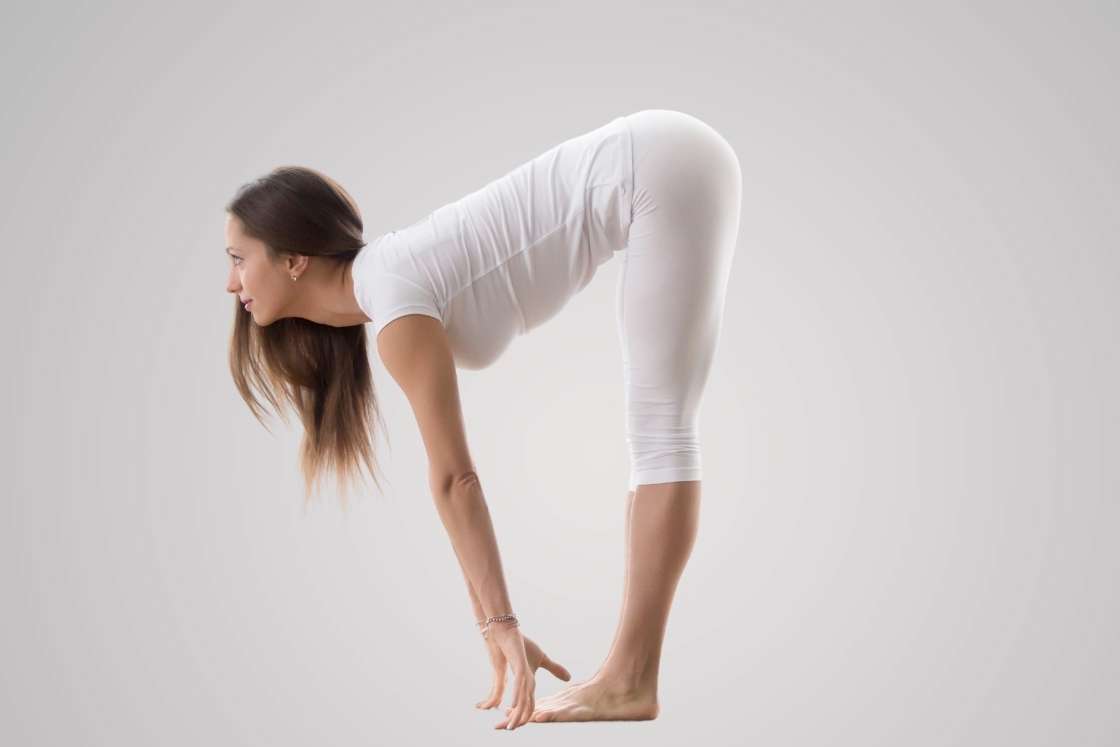
Standing Half Forward Bend Pose, also known as Ardha Uttanasana in Sanskrit, is a fundamental element of Vinyasa yoga and serves as an intermediate posture within the Sun Salutation sequence.
This yoga asana offers a multitude of benefits, including enhancing spinal flexibility and fortifying core muscles, hips, hamstrings, calves, and both upper and lower back regions.
Its simplicity renders it accessible for practice anytime and anywhere, making it an effective warm-up posture as well.
Particularly within Vinyasa sequences, Ardha Uttanasana aids in maintaining rhythmic breath awareness during transitions between poses.
For athletes seeking to improve balance and flexibility, yoga presents a promising avenue. A study conducted over 10 weeks demonstrated notable enhancements in these aspects among practitioners.
How to perform Standing Half Forward Bend Pose:
1. Start by positioning yourself upright with your feet spaced at hip-width distance.
2. Inhale deeply as you extend your arms overhead.
3. Exhale slowly, hinging forward from your hips while maintaining elongation in your spine.
4. Place your hands on the floor or clasp them together behind your back, depending on your comfort and flexibility.
5. Hold the pose for a few moments, focusing on steady breathing.
6. Release gently and repeat the sequence as desired, listening to your body’s cues.
4. Reclining Bound Angle Pose (Supta Baddha Konasana):
This particular posture provides relief from tightness and discomfort in the hip and groin regions.
Lie down on your back, bending your knees and placing the soles of your feet together.
Allow your knees to relax outward, supporting them with blocks or cushions as needed.
Relax your arms at your sides and breathe deeply, allowing gravity to gently stretch your hips and groin.
How to do it:
1. Start by taking a seated position on the ground, extending your legs straight out in front of you.
2. Next, gently bend your knees and bring your heels in towards your pelvis, allowing the bottoms of your feet to meet.
3. Allow your knees to naturally fall outwards, forming a diamond shape with your legs.
4. Slowly lower your torso backward, using your hands for support, until you’re lying flat on your back.
5. Adjust the position of your feet so they are as close to your pelvis as comfortable, without straining.
6. Relax your arms by your sides, palms facing up, or place your hands on your belly or thighs.
7. Close your eyes and focus on your breath, allowing your body to sink deeper into the pose with each exhale.
8. Stay in the pose for 1-5 minutes or longer, depending on your comfort level and the duration of your yoga practice.
9. To release the pose, gently bring your knees together and roll onto one side before slowly sitting up.
5. The Legs-Up-the-Wall Pose:
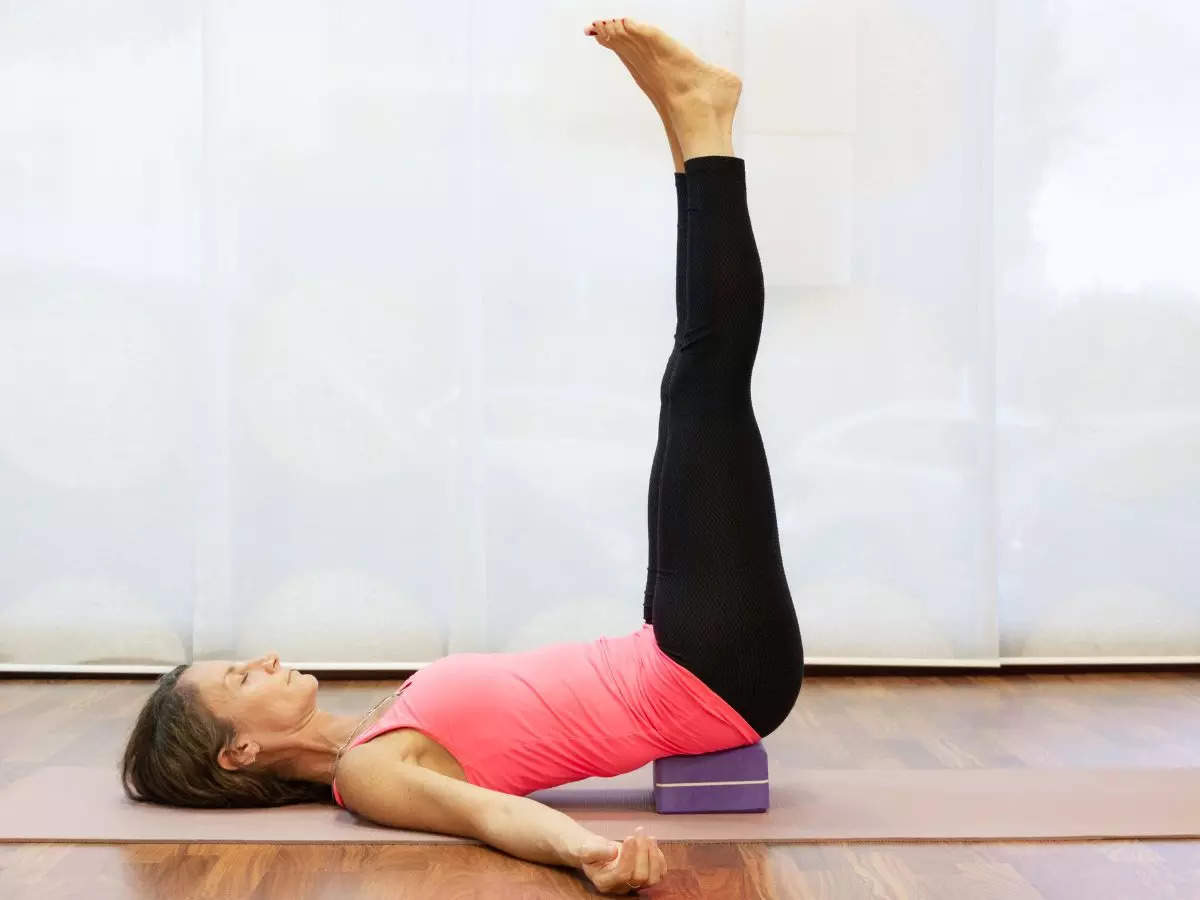
also known as Viparita Karani in Sanskrit, is a deeply restorative yoga posture celebrated for its multitude of benefits, attracting many individuals seeking relaxation and rejuvenation.
Renowned for its accessibility and adaptability, this pose is highly inclusive, catering to individuals of varying fitness levels, including beginners to yoga or exercise enthusiasts.
Often integrated into Hatha, Yin, or restorative yoga sessions, the Legs-Up-the-Wall Pose can serve as a standalone practice or be seamlessly incorporated into a cooldown routine.
How to perform the Legs-Up-the-Wall Pose:
1. Begin by positioning yourself next to a wall, sitting with your right side against it, and your knees bent, drawing your feet toward your hips.
2. Gently swing your legs up the wall as you recline onto your back, ensuring your hips are either pressed against the wall or slightly away, depending on your comfort.
3. Find a comfortable arm position, allowing your arms to rest naturally by your sides or in any preferred position.
4. Optionally, enhance relaxation by placing supportive props such as a cushion, folded blanket, or bolster beneath your hips or head.
5. If desired, bend your knees to the degree that feels comfortable, and consider placing a pillow between your knees and the wall for added support.
6. To further deepen relaxation and foster inward focus, you may cover your eyes with a mask or pillow, engaging in the practice of pratyahara.
7. Remain in this soothing posture for up to 20 minutes, allowing your body and mind to unwind completely.
8. When ready to release the pose, gently push yourself away from the wall and return to a reclined position on your back.
9. Take a few moments to bask in the afterglow of relaxation before drawing your knees into your chest and rolling onto your right side.
10. Rest briefly before gradually transitioning to an upright seated position.
6. Corpse Pose (Savasana)
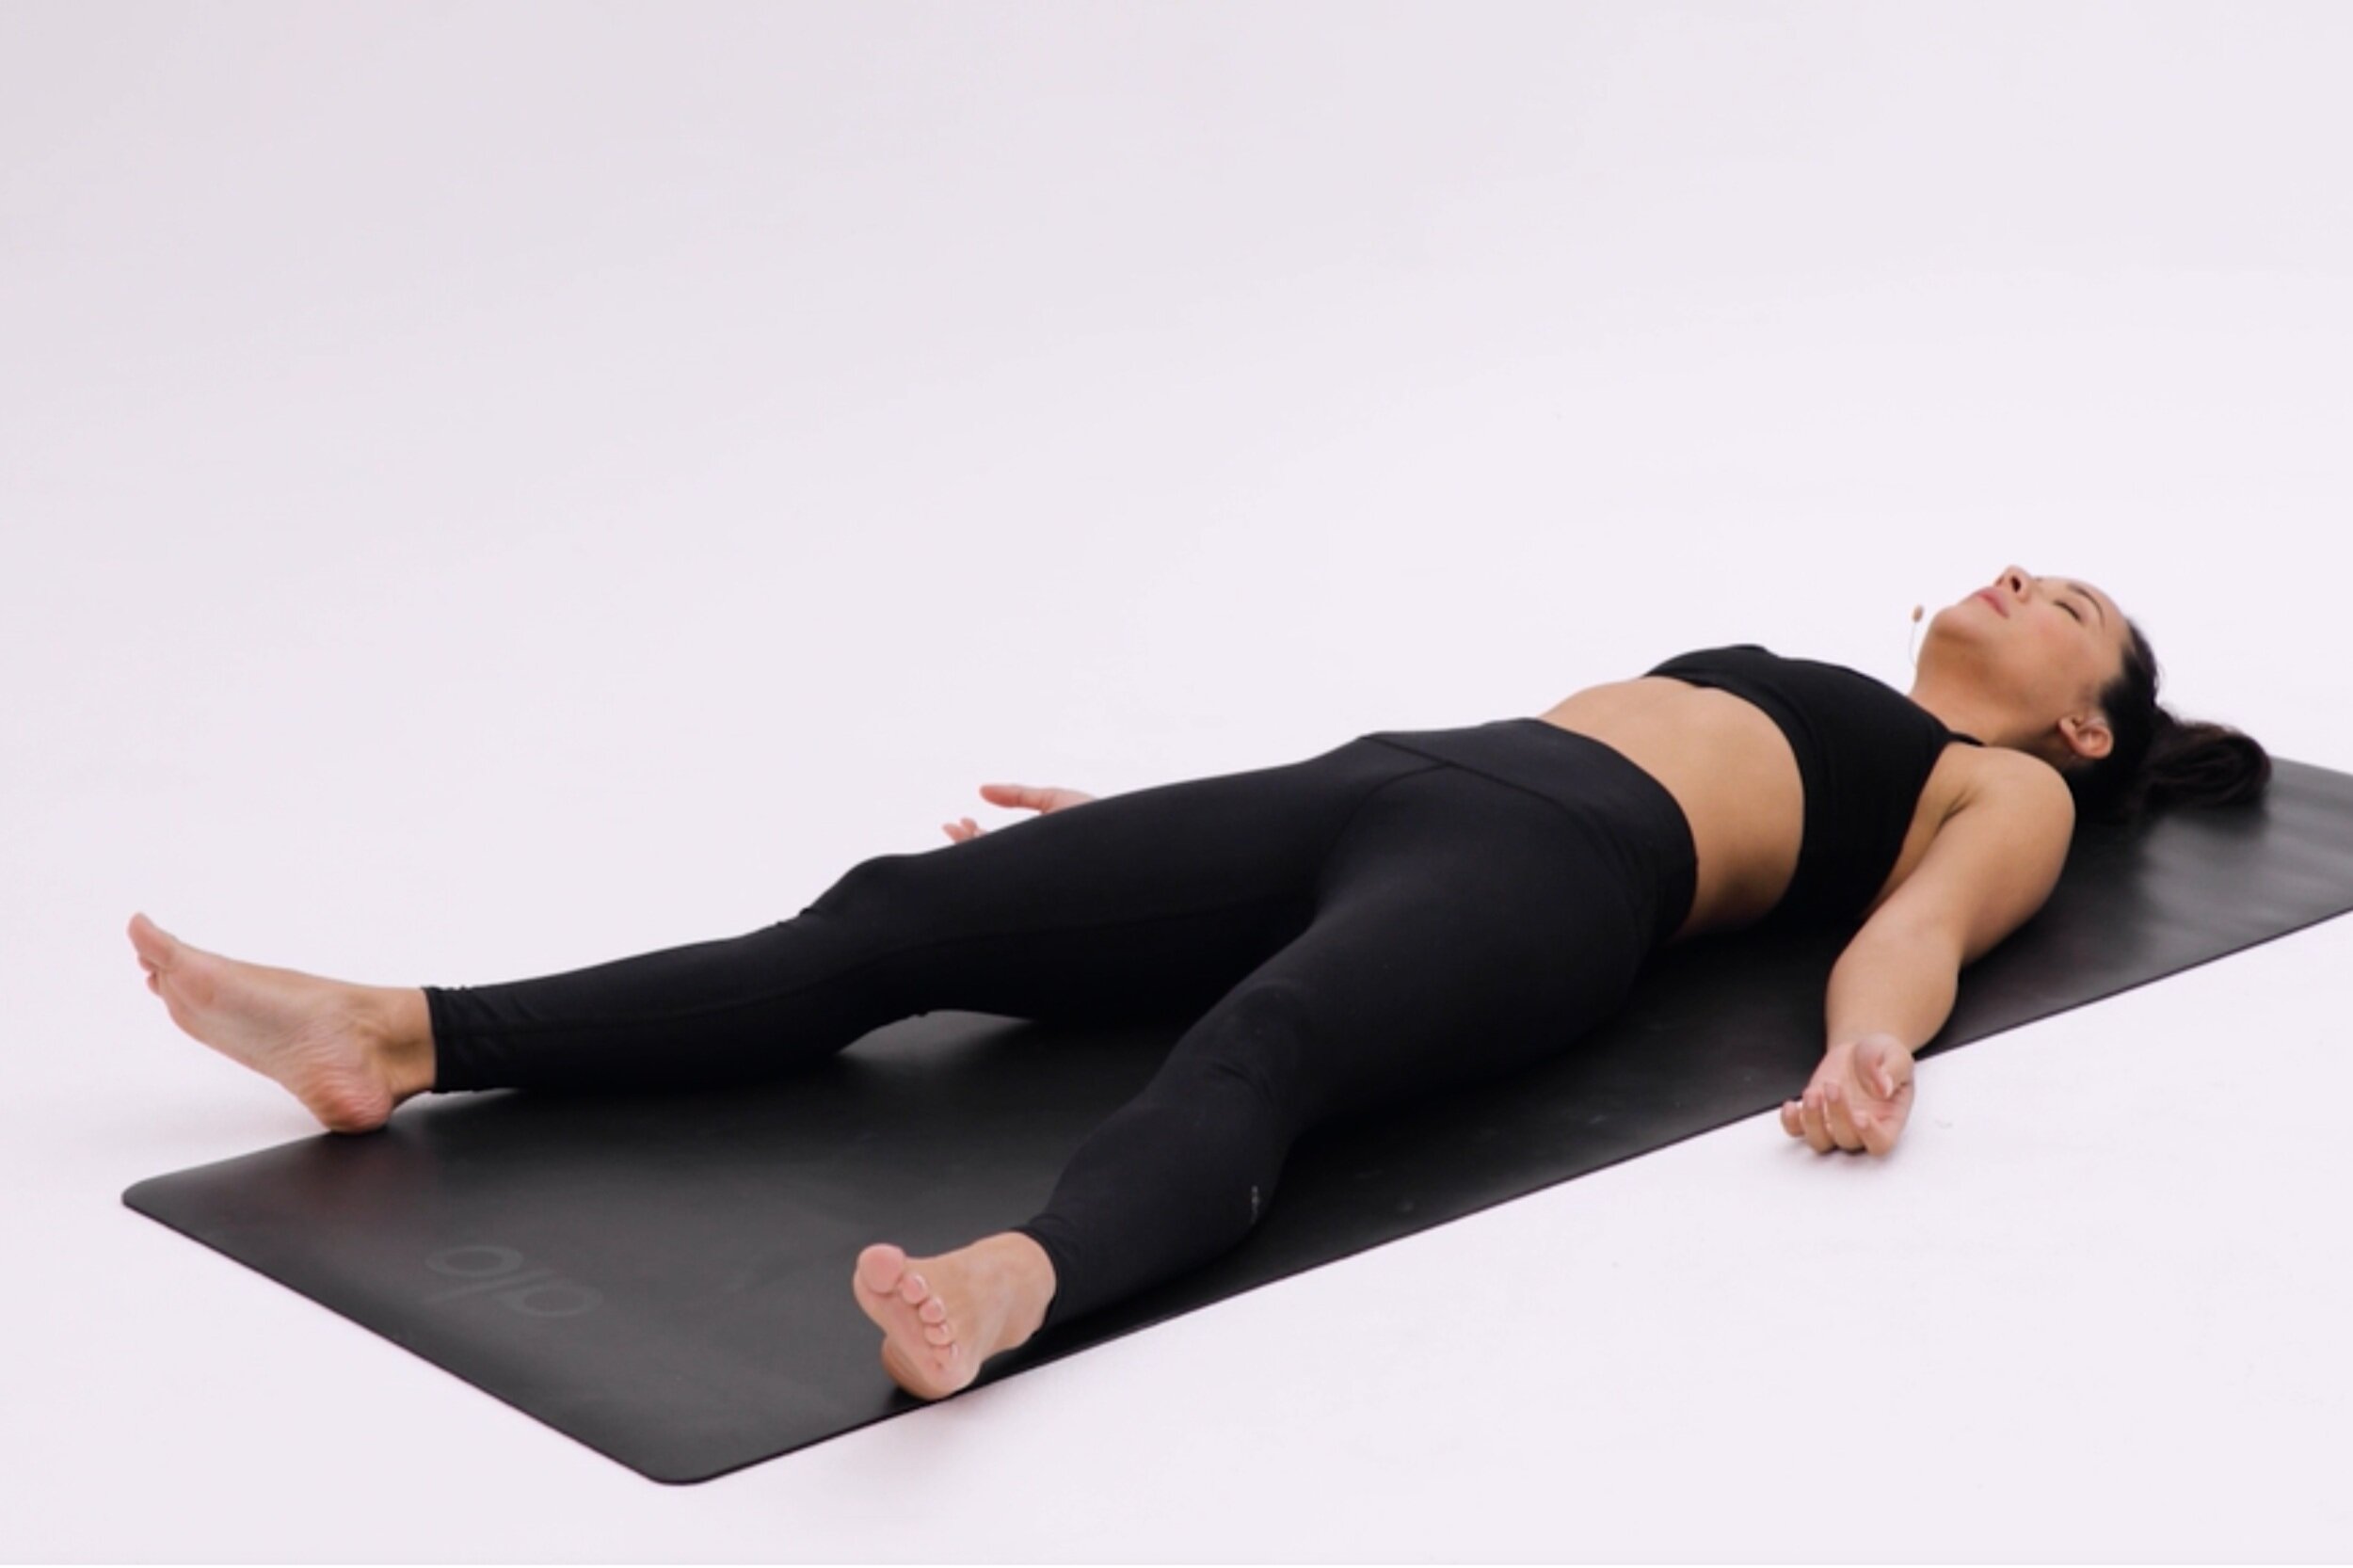
Every yoga session culminates with a vital relaxation posture, and Corpse Pose (Savasana) holds significant importance in this regard.
While it resembles a state of rest akin to sleep, it differs as it necessitates remaining present and aware throughout the five to 10 minutes dedicated to final relaxation.
Step-by-step instructions for practising Corpse Pose:
1. Begin by lying down on your back, allowing your body to settle into the ground.
2. Gently separate your legs, allowing them to relax naturally with your feet falling open to either side.
3. Position your arms alongside your body, maintaining a slight separation from your torso. Turn your palms upwards, allowing your fingers to curl in naturally.
4. Tuck your shoulder blades onto your back, providing support akin to the movement in Bridge Pose but with less intensity.
5. Once your limbs are set, release any tension or effort from holding them in position. Surrender your entire body to relaxation, including your facial muscles. Let your body feel weighty as you sink into the ground.
6. Allow your breath to flow naturally. If your mind wanders, gently guide your attention back to your breath, simply observing without attempting to alter its rhythm.
7. Remain in Corpse Pose for a minimum of five minutes, ideally extending to 10 minutes for enhanced relaxation. To avoid interrupting your practice, consider setting an alarm.
8. To conclude, begin by deepening your breath gradually. Then, gently wiggle your fingers and toes, gradually reawakening your body.
9. Extend your arms overhead for a full-body stretch, from your fingertips to your toes.
10. Draw your knees into your chest and roll over to one side, maintaining closed eyes. Utilize your bottom arm as a pillow, resting in a fetal position for a few breaths.
11. Using your hands for support, slowly return to a seated position, maintaining the sense of tranquility cultivated during Corpse Pose.
7. Legs on a Chair Pose:

This variation of Legs Up The Wall Pose provides support for those with lower back, knee, or hip injuries.
Begin by placing a chair at the end of your mat and lying back with your calves resting on the seat of the chair.
Keep your thighs at a 90-degree angle to your shins and relax your arms at your sides.
Breathe deeply and focus on relaxing any tension in your legs and lower back.